Creating Escalations
Once the escalation hierarchy has been defined, this section will guide you through configuring shifts along with their corresponding escalations in 24Cevent. You will learn step by step how to create shifts for each level and link them together, establishing the logic that allows alerts to escalate automatically based on your team's structure.
How to Configure an Escalation
To correctly configure escalations, follow these steps:
1. Create Shifts Without Escalation
Before configuring escalations, you must create shifts for all hierarchy levels. At this stage, the shifts should not have any escalation assigned.

Go to Teams Shifts in the side menu.
Click "New Shift".
Fill in the fields:
Shift Name: Use the recommended naming format.
Contacts or Job Positions: Assign the corresponding job position or contact.
Escalation Shift: Leave it as "No Apply" for now.
Rotation Type, Start & End Date, Days of the Week, Time Blocks: Complete as needed.
Save the shift.
💡 Note: Make sure all shifts for all levels are created before configuring escalations.
Relationship Between Shifts and Escalations
Shifts are created for each job position or contact, as shown in the second image of created shifts. Each shift follows the established job position hierarchy and follows the recommended format:
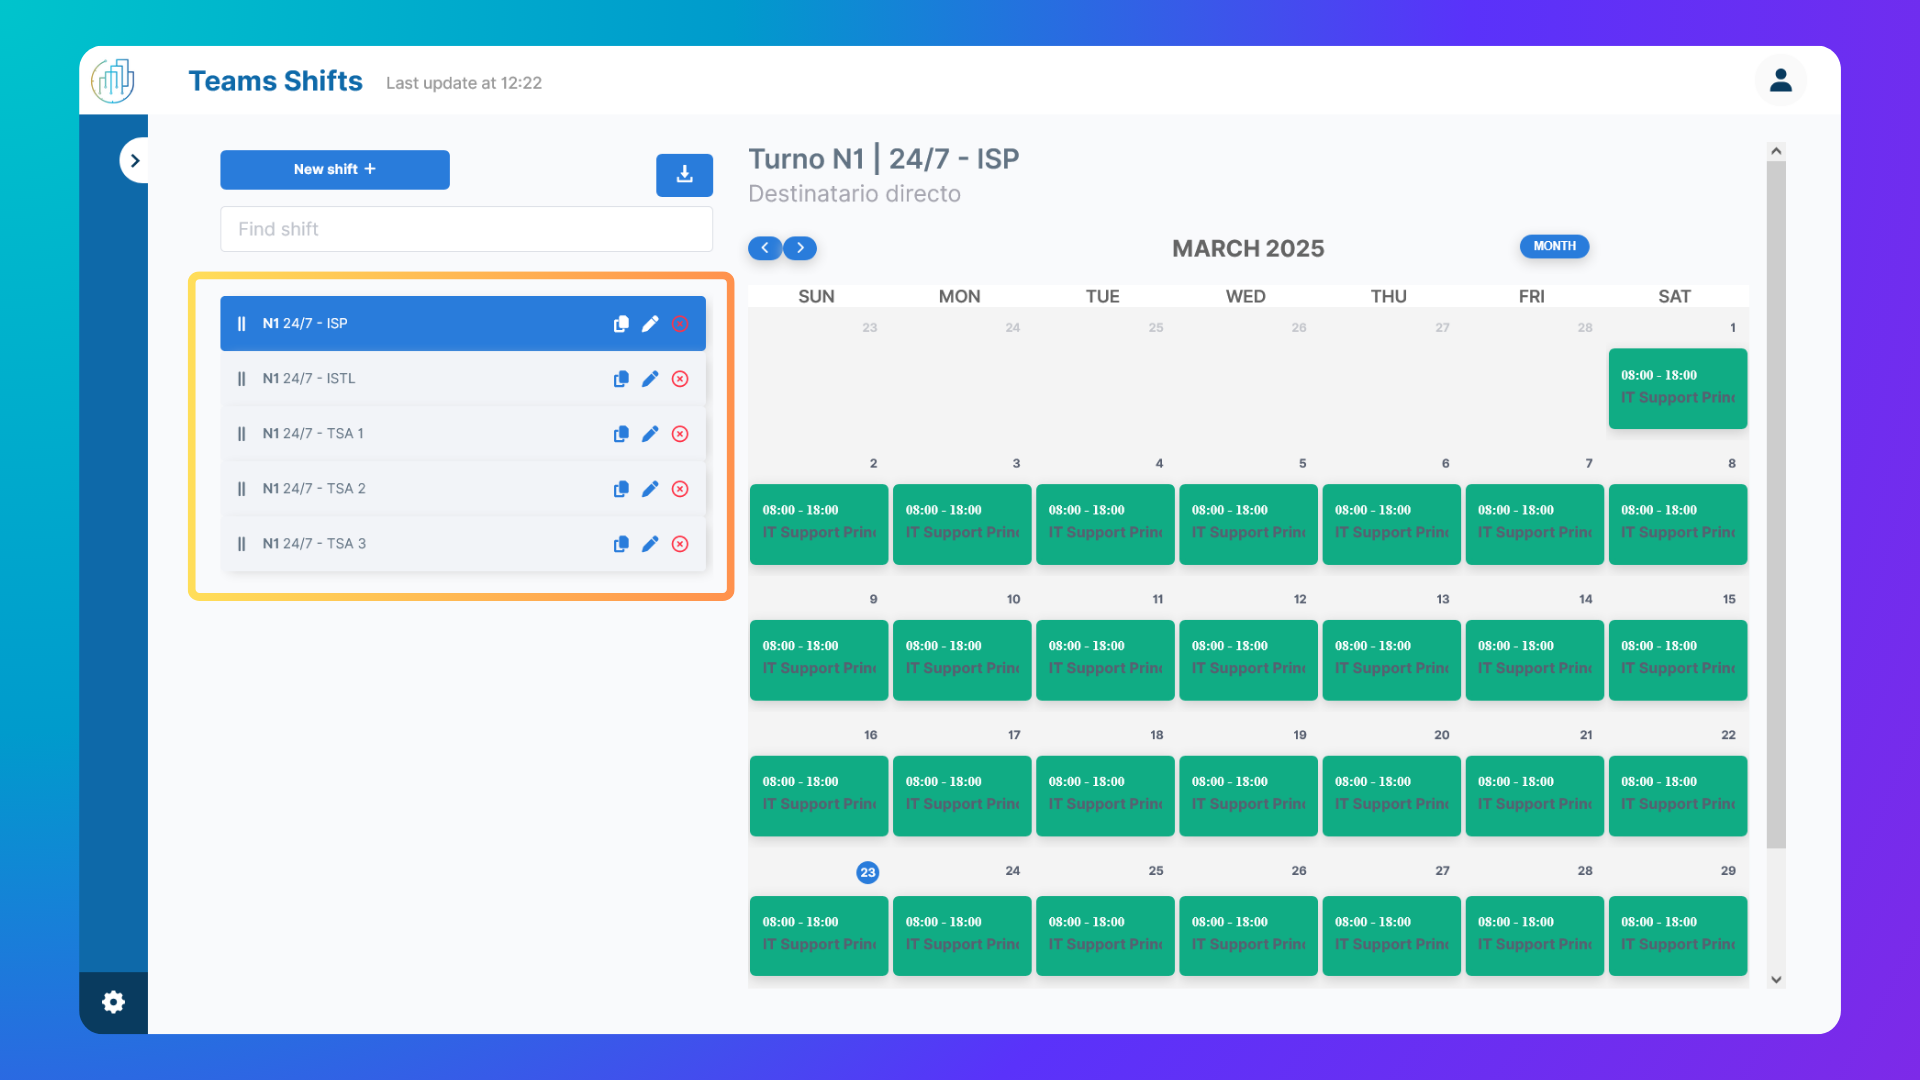
Recommended format:
24/7 - Job Position Name(Example:24/7 - IT Support Principal).Multiple shifts can be assigned to the same job position if different schedules exist.
The same job position can participate in multiple shifts, depending on operational needs.
In this example, each job position has a unique shift assigned to better illustrate how escalations are configured.
2. Assign Escalations
Now that all shifts are created, they must be linked according to the hierarchy.
Step 1: Escalate from Analysts to the Technical Lead
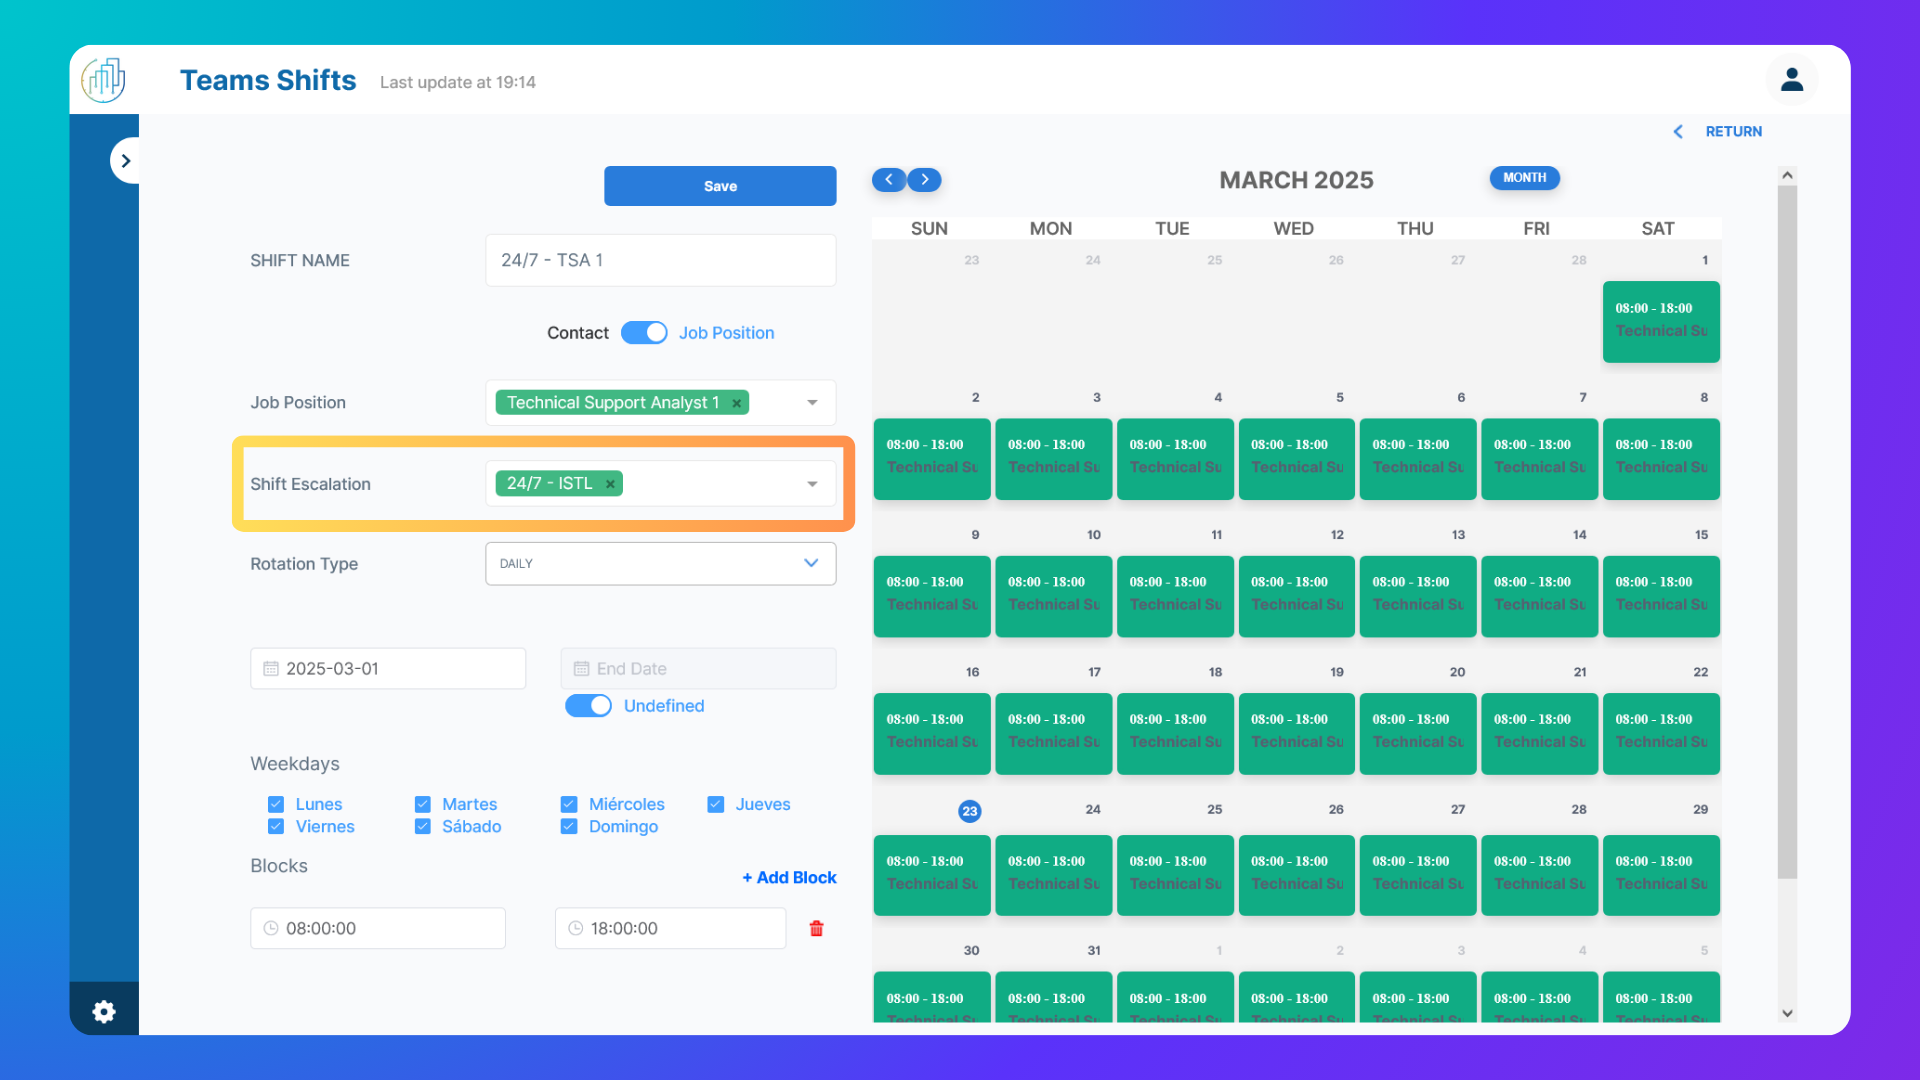
Edit the shift for the Technical Support Analysts.
In the Escalation Shift field, select the shift for the IT Support Technical Lead.
Save the changes.
Step 2: Escalate from the Technical Lead to the IT Support Principal
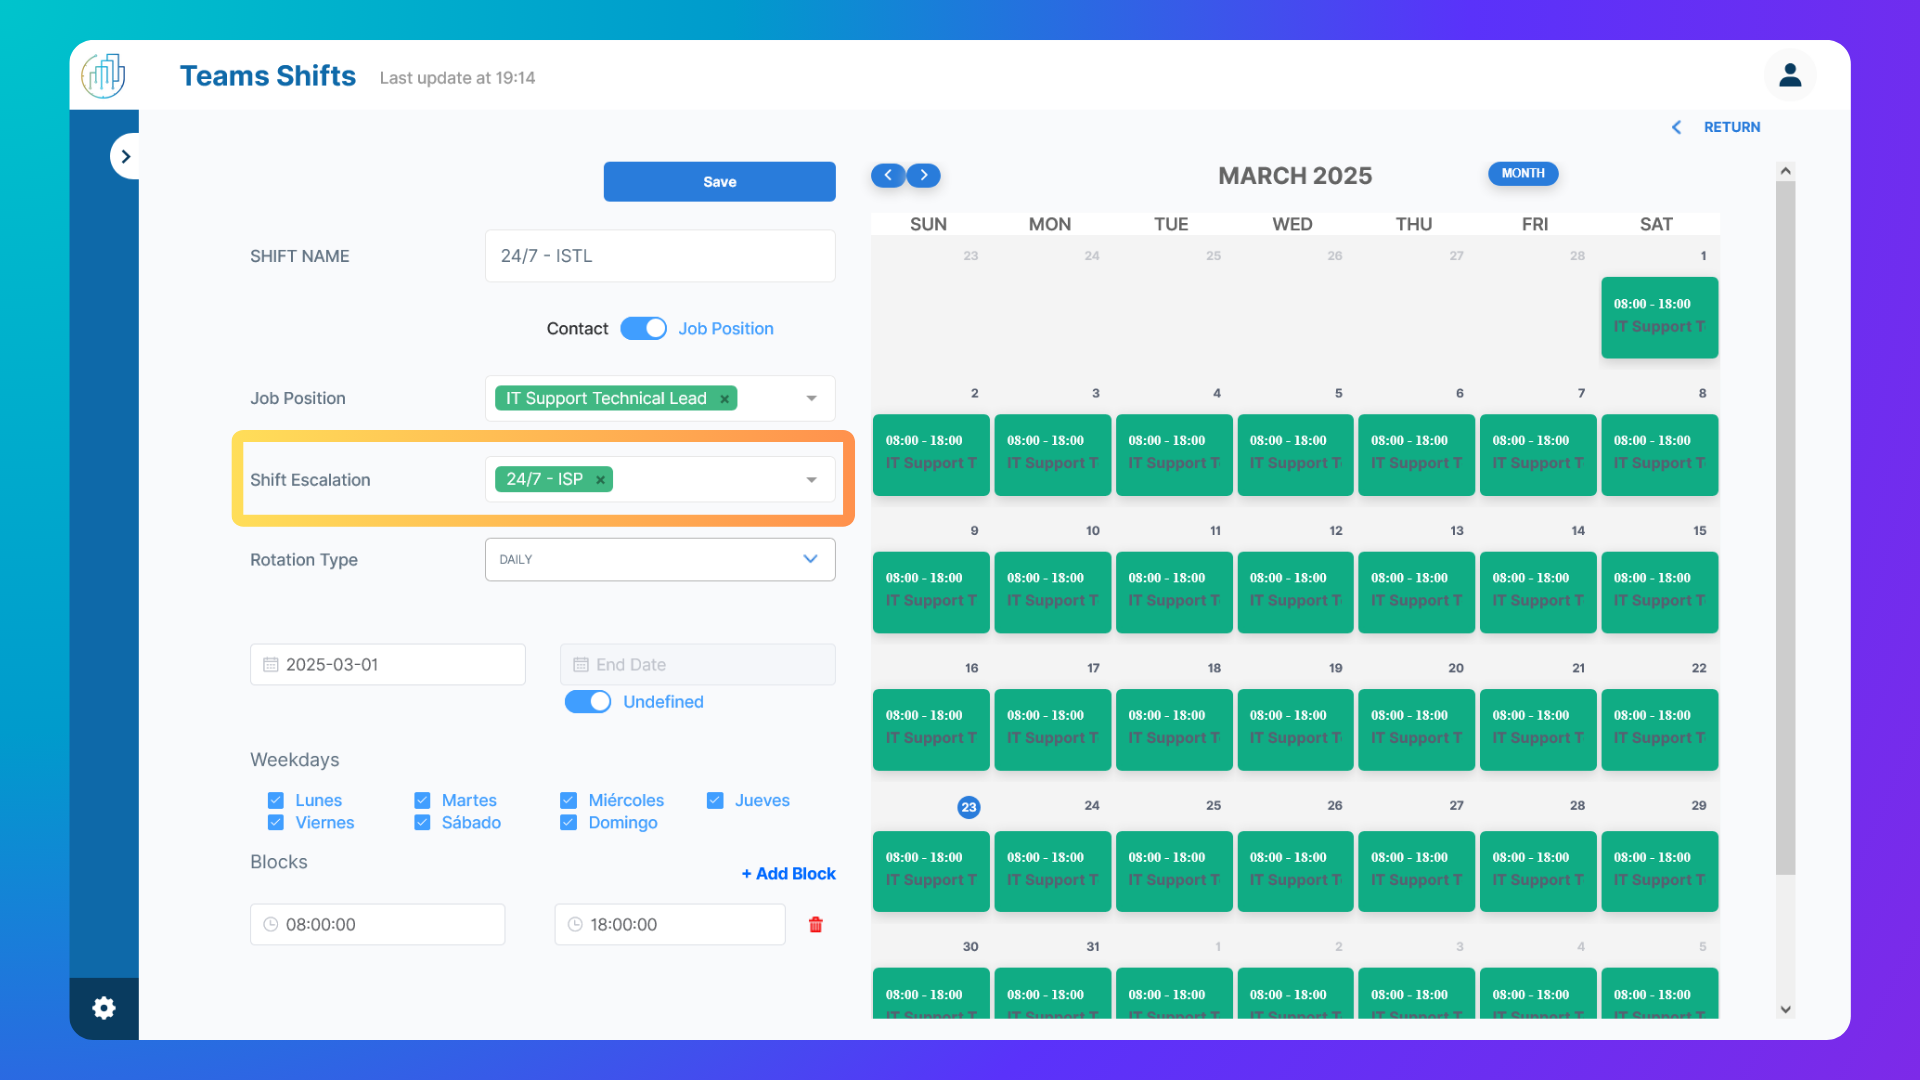
Edit the shift for the IT Support Technical Lead.
In the Escalation Shift field, select the shift for the IT Support Principal.
Save the changes.
Now, any alert not handled by the analysts will escalate to the Technical Lead, and if there is still no response, it will escalate to the IT Support Principal.
3. Escalation Hierarchy Visualization
Once all escalations have been configured, the main Teams Shifts view will display how the previously separate shifts now appear connected in a hierarchical structure:
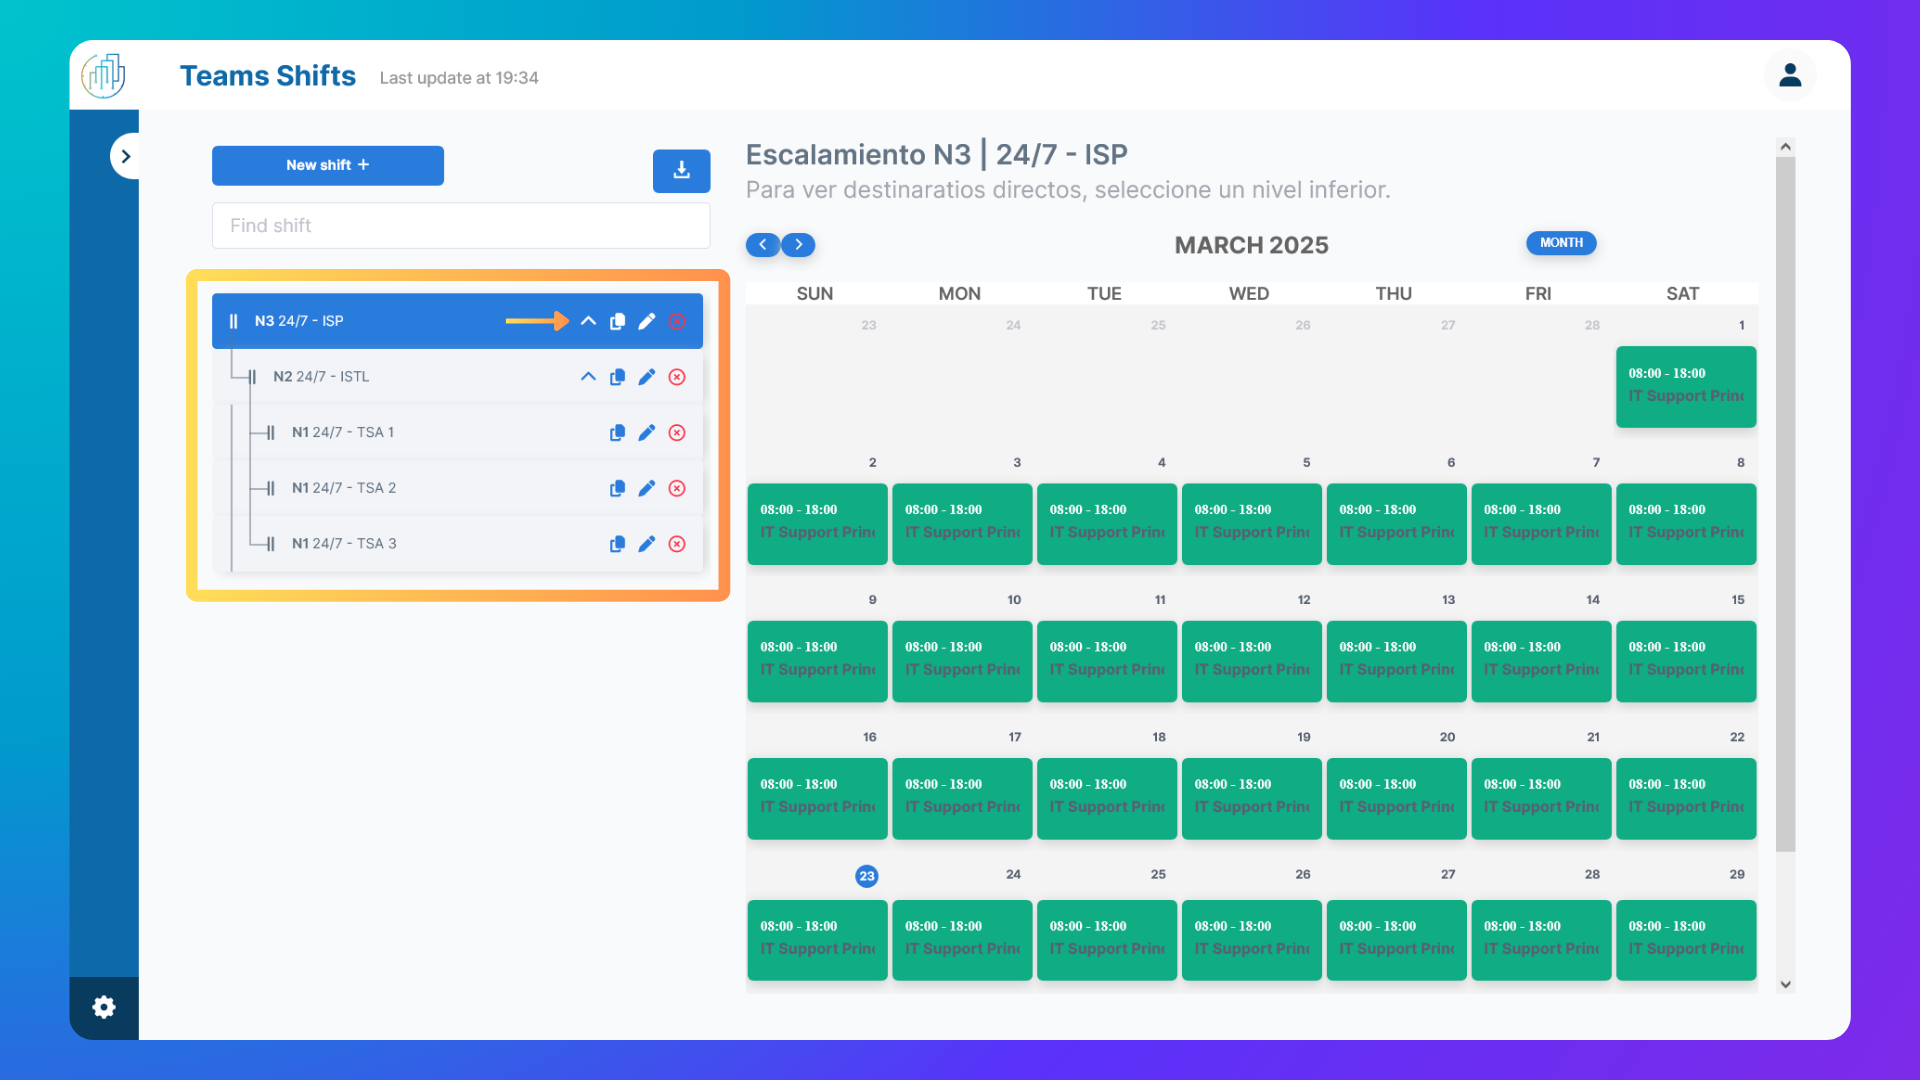
This graphical representation forms a structured escalation diagram, making it easier to understand the flow of notifications and quickly identify how shifts are linked. It’s a highly useful visual tool to validate the configuration and easily detect any issues or gaps in the escalation chain.